 A freelance writer, I’m a new user to QuickBooks for Mac. Until now, I’ve been managing my business with an ultra-professional jumble of Excel spreadsheets and notes scrawled on a motley heap of notebooks. Oddly enough, this system hasn’t produced the best results. So how did I get going with QuickBooks for Mac? Here’s my story…
My first step was to be sure that I had the latest version of QuickBooks for Mac installed on my computer. My second step was to open QuickBooks and check out the sample company file. The sample company taught me a lot about what I’d need to create—lists of customers, lists of vendors, and lists of items I work with. After a couple of hours touring the sample company to get my bearings, I felt ready to take the plunge.
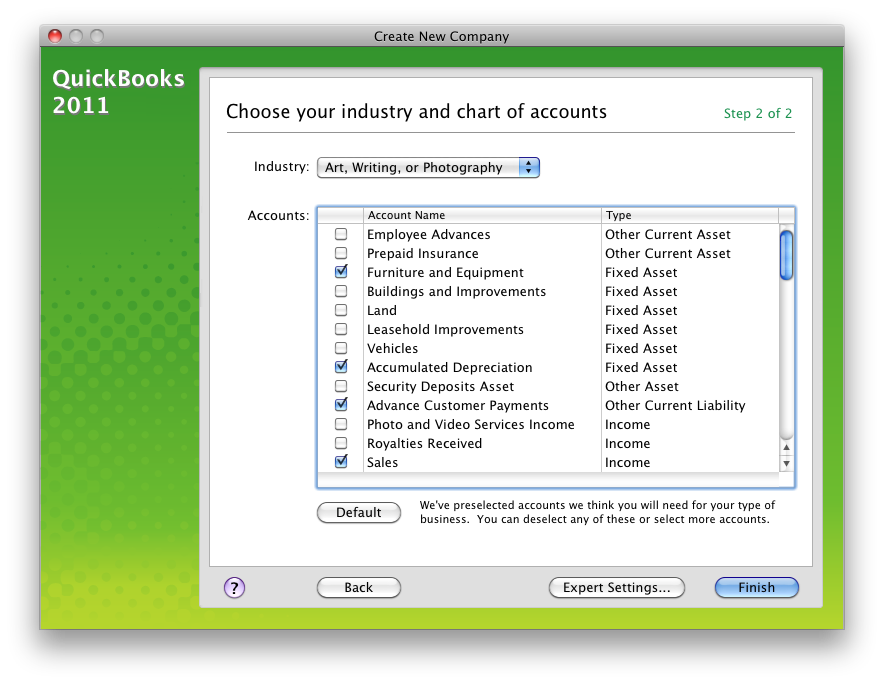
I clicked File > New Company and answered the questions on the first window. After clicking Next, I found myself in new territory—the Choose your industry and chart of accounts window. The industry was easy. But as a professional writer, I’d never even seen the term “chart of accounts” before. Happily, QuickBooks made it reasonably simple for me to set up my chart of accounts. In addition to the defaults that appeared when I chose my industry, I selected account names that looked like they matched my business—Royalties Received, Travel Expenses, and Continuing Education, for example.
After I finished scrolling and selecting accounts, I clicked Finish and Poof! I was in business!
On my Home page, I skipped the tour since I’d already played with the sample company. But just to be safe, I left the Guide Me slider in the upper right corner of my home page turned on. Guide Me provides pop-ups with helpful tips whenever I start a new task.
I closed the Home page and got straight to creating my lists—the backbone of the QuickBooks accounting system. Thinking optimistically, I began with my customer list and clicked the Customers icon in the toolbar. There’s a lot of information that can go into a customer listing, but for a start all I added was names and email addresses. I can add or change more information to a customer any time, and I wasn’t sure yet exactly what to add to the Additional Info, Jobs, and Notes tabs, so I left them alone.
Because I’m the sole proprietor of a service business, I didn’t have any employees to list. I listed my few vendors—my tax accountant, the attorney who reads my contracts, and my business consultant—in the Vendor Center. After entering customers, entering vendors seemed simple—the process is about the same.
Next, I clicked the Items icon and the barren Items list opened. Items are key to accounting in QuickBooks. In my business, items I sell include articles, blog posts, and books, so that’s what I added to the Items list.
Though my QuickBooks lists were far from finished, I needed money! Specifically, I needed to bill one of my customers for a job I’d completed recently. So it was time to create my first invoice.
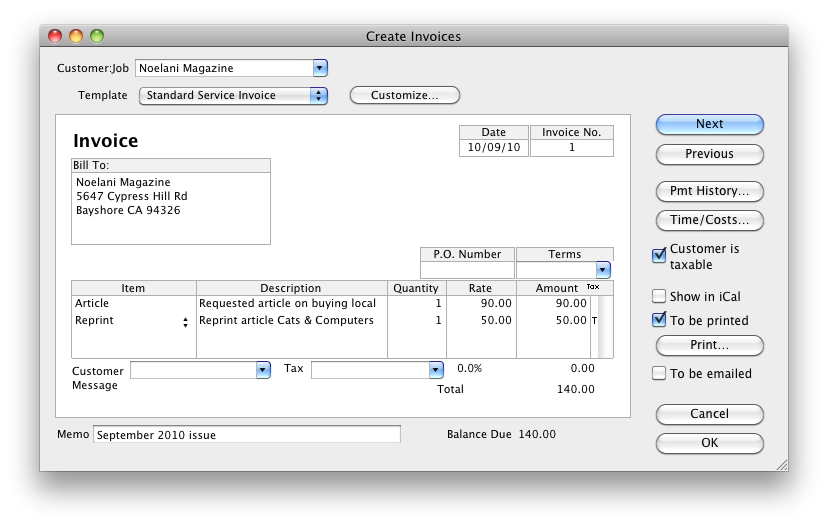
I clicked the Create Invoices icon in the middle of the Home page and the Create Invoices window opened. I decided to go with the Standard Service Template and leave playing with Layout Designer (a QuickBooks tool for customizing forms) for another time. Instead, I concentrated on filling in the invoice with the correct information. But when it came time to click OK, QuickBooks informed me that I needed a Tax item to add to the invoice even if sales tax was not applicable to any of the items on this invoice. But I hadn’t created any Tax items on my Items list—oops!
I went back to the Items list to create a No Tax item. Then I switched back to my invoice and added No Tax to my invoice. Now that the invoice was complete, I cleared To Be Printed and checked To Be Emailed and clicked OK.
Had QuickBooks emailed my invoice when I clicked OK? I wasn’t sure. I looked for an Email command in the menus and found File > Email Forms. When I clicked it, the Email Forms window opened and I saw the invoice I just created patiently waiting there. When I clicked the Email button, QuickBooks opened another window that contained draft email message text to accompany the invoice. I made a few changes and clicked Send to send it off.
Now that my first invoice was finished, I felt like I was getting to be friends with QuickBooks for Mac.


