Part 1: Overview | Part 2: Vendor transactions | Part 3: Customer transactions
| Part 4: Banking and other
 This is the second in a series of articles about how to get your historical data into QuickBooks. In my first article, I gave you a brief overview of what you need to know before you start. If you haven’t already, it’s a good idea to read over that first article before continuing. In this second article, I’m going to get into more detail and talk about entering the transactions that deal with money you’ve paid to your vendors.
Strictly speaking, there’s no rule that says you have to enter your transactions in a particular order. But I recommend that you enter your vendor-related transactions first, especially if you invoice customers for expenses you want to be reimbursed for. Here’s why: You won’t be able to include expenses on an invoice for reimbursement unless that expense is accounted for with a purchase-related transaction. So, it’s a good idea to get those vendor transactions in first.
Let’s get started! The first thing to do is enter all your transactions related to buying items and services from your vendors. You only need to enter transactions from the start date you used for your company file until today.
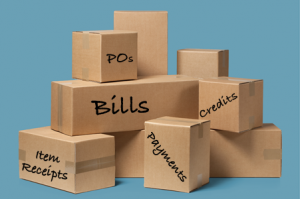
Vendor transactions to enter are:
- Purchase orders
- Item receipts
- Bills
- Payments you made to your vendors
Gather the information you’ll need
To get started, you’ll need this information for the timeframe between your company file’s start date and today:
- Details of any POs you’ve sent to vendors, if you use purchase orders
- A list of inventory items you’ve received
- Any bills you’ve received
- Records of bill payments you made
Entering transactions
Now you’re ready to enter your transactions. If you haven’t set up your Items or Vendors lists yet, you’ll be asked to add these as you go along. For example, if you’re entering a bill and enter the name of a vendor not in your Vendors list, QuickBooks asks you if you want to Quick Add it. Go ahead and do that. You can go back to the Vendors list later and add more details about this vendor.
You can use the Vendors area on the Home page to enter your transactions. Remember, you only need to enter the transactions between your company file’s start date and today.
Enter these transactions in this order, and be sure you enter the correct date. You can enter all these transactions on the Home page.
- Purchase orders. If you use them, enter your purchase orders first. You’ll use these PO transactions when you enter bills.
- Bills. For all the bills you’ve received, enter the information about each bill. Be sure to assign amounts to the correct expense accounts or track the quantities and costs of items received. If you need details about doing this, check the Help.
- Inventory item receipts. If you received items you’ve ordered but didn’t get a bill for them, choose Receive Inventory and enter an item receipt.
- Credits from vendors. If you have a credit from a vendor, choose Enter Bills and select Credit at the top of the windows.
- Payments. For payments you’ve made, choose Pay Bills. Be sure the Payment Date field shows the actual day you made the payment. Also check that you select the correct bank account for the payment.
That’s it for entering your vendor transactions. Next, we’ll talk about entering transactions related to your customers.
[Special thanks to Maria Langer and her QuickBooks 2011 for Mac guide for contributing to this article.]


