 Progress invoicing is a great way to invoice your customers over time for work you do for them. And many times, that work involves billable time. So how do you apply that billable time to a progress invoice?
A couple of things to understand
Before I get into the details of how to do this, there’s a couple of things to understand. Progress invoicing starts with an estimate which lists what you think you’re going to charge a customer. But when you get to the point of the sending an invoice, you need to list the time that was actually worked. So what you need to do is remove the time you thought would be done (estimate) andreplace it with the time that was actually done (invoice).
How this works
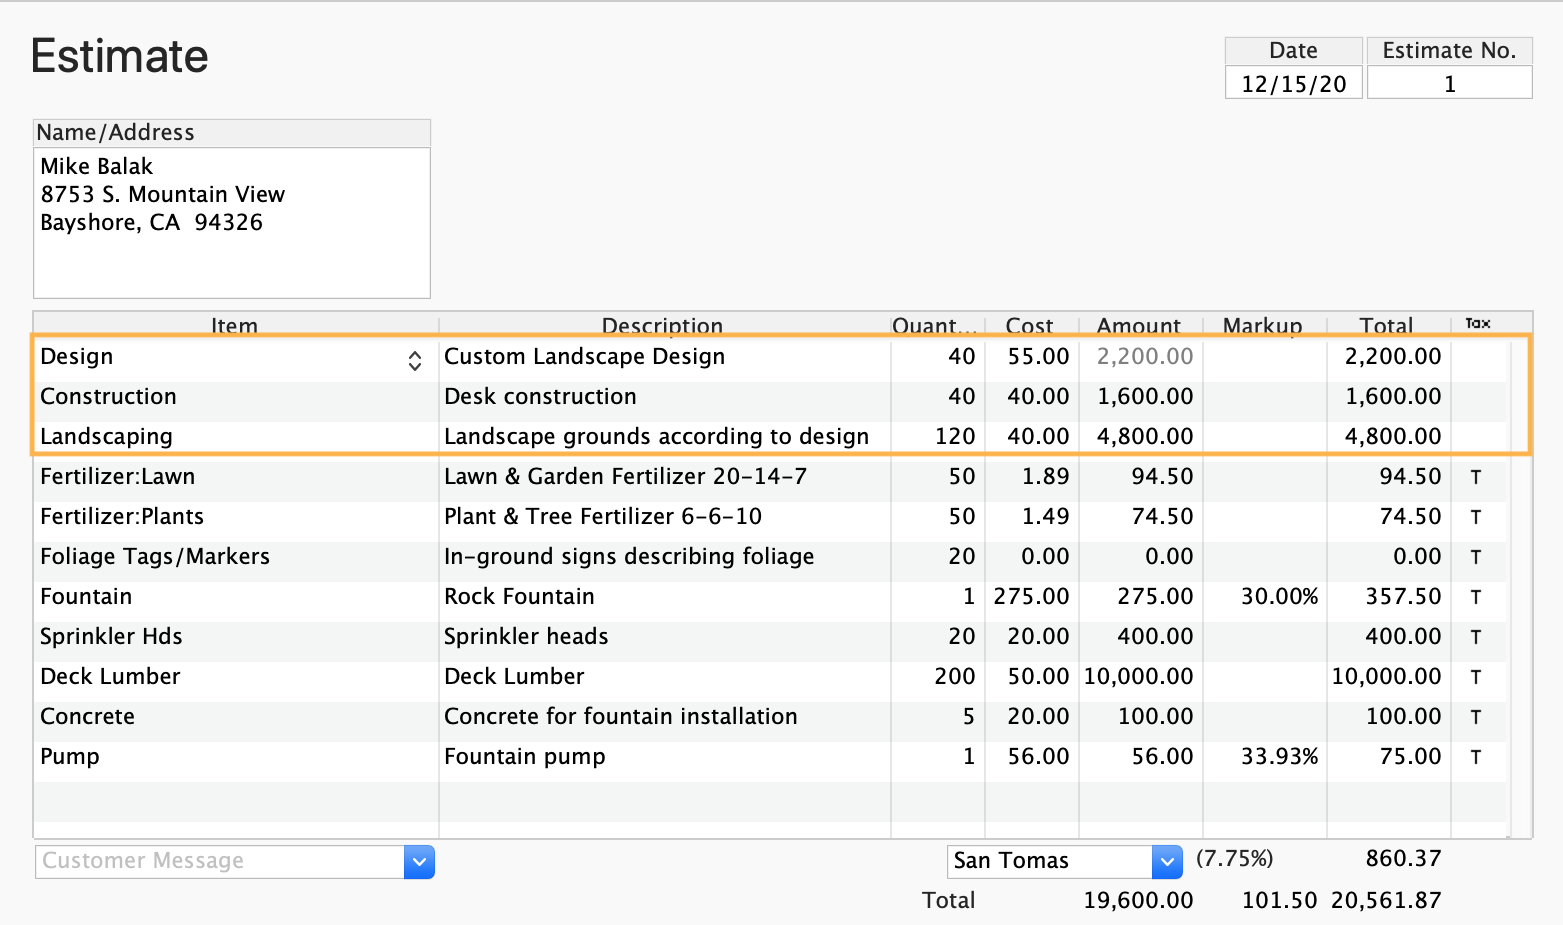
In this example, my company is Larry’s Landscaping. I’ve sent an estimate to a client for a new landscaping project at his new home. In addition to materials, I’ve included estimates for design, landscape, and deck construction.
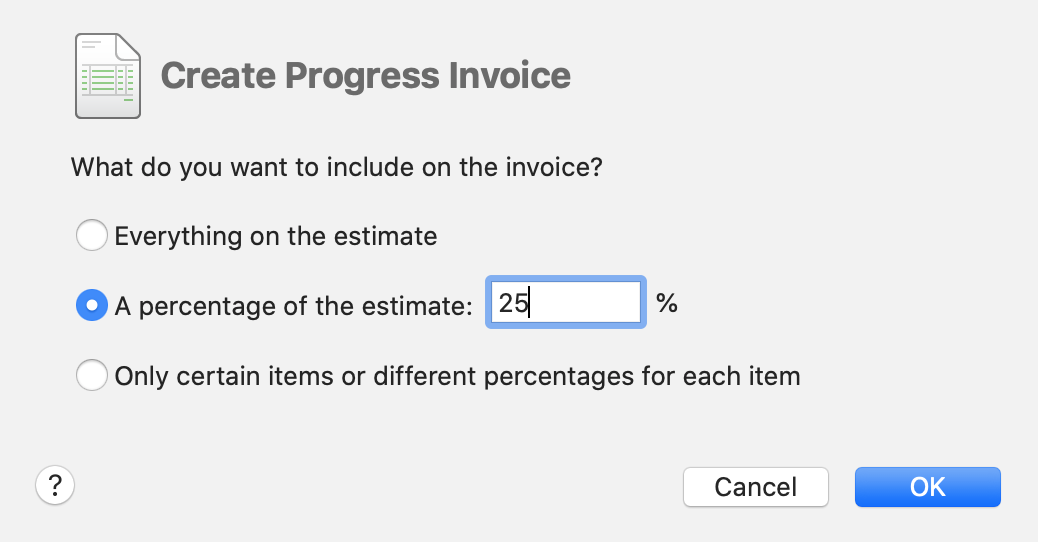
Now when I click Create Invoice at the top of the estimate, I see the Progress Invoicing window. I’m invoicing this client for 25% of the job right now, so I enter that in this window.
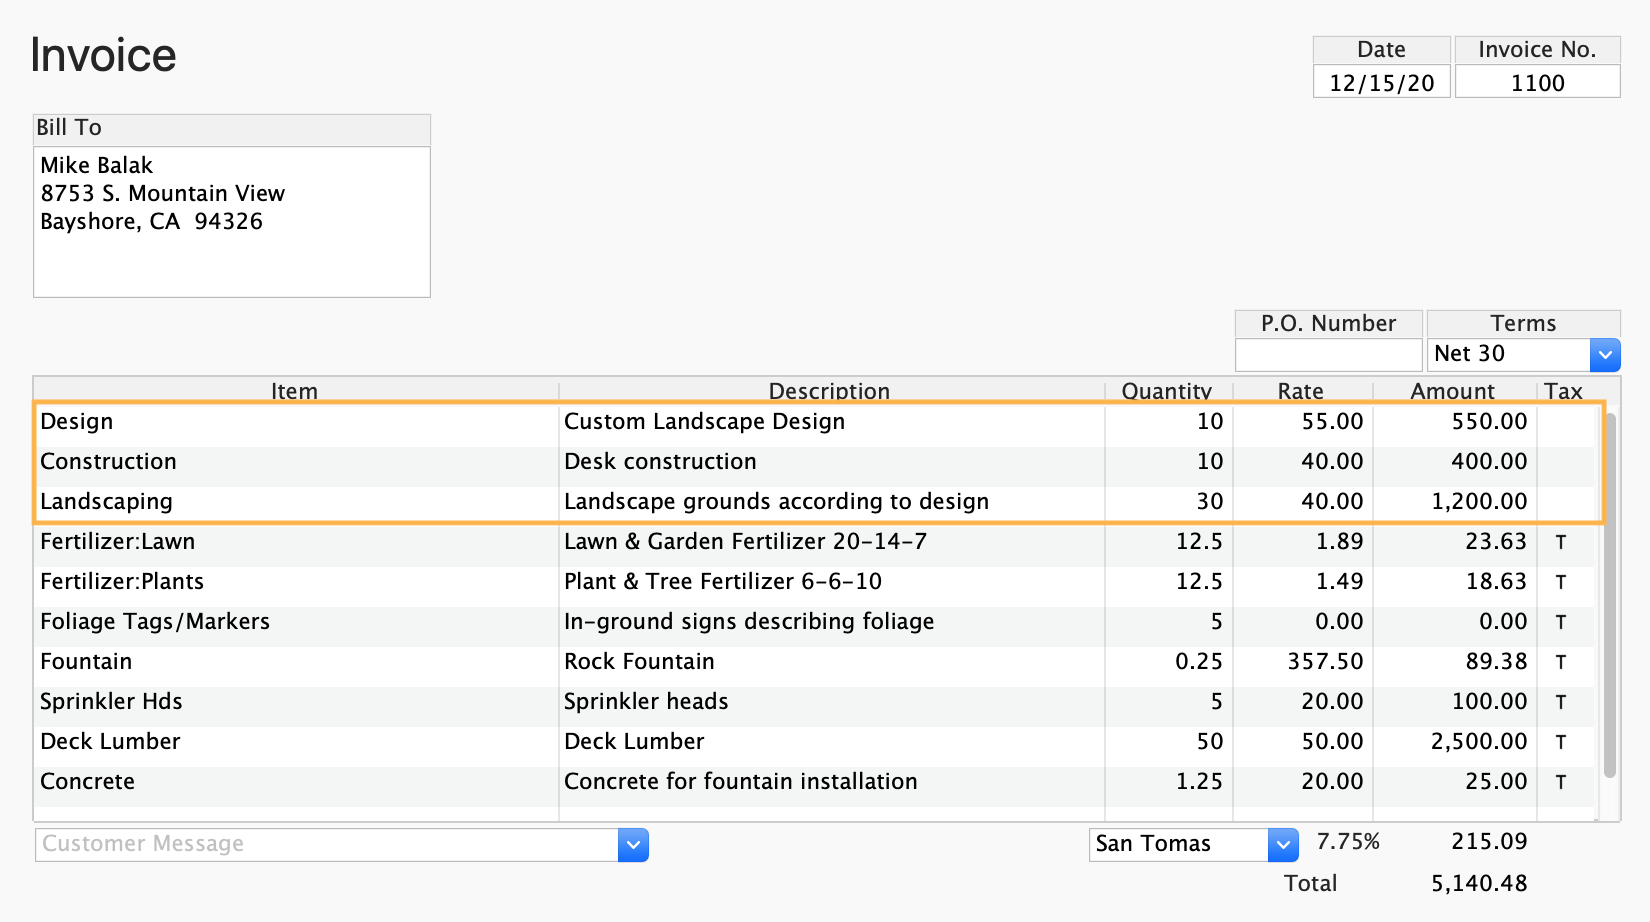
So here’s the problem. I have 25% or my estimated time on my invoice…
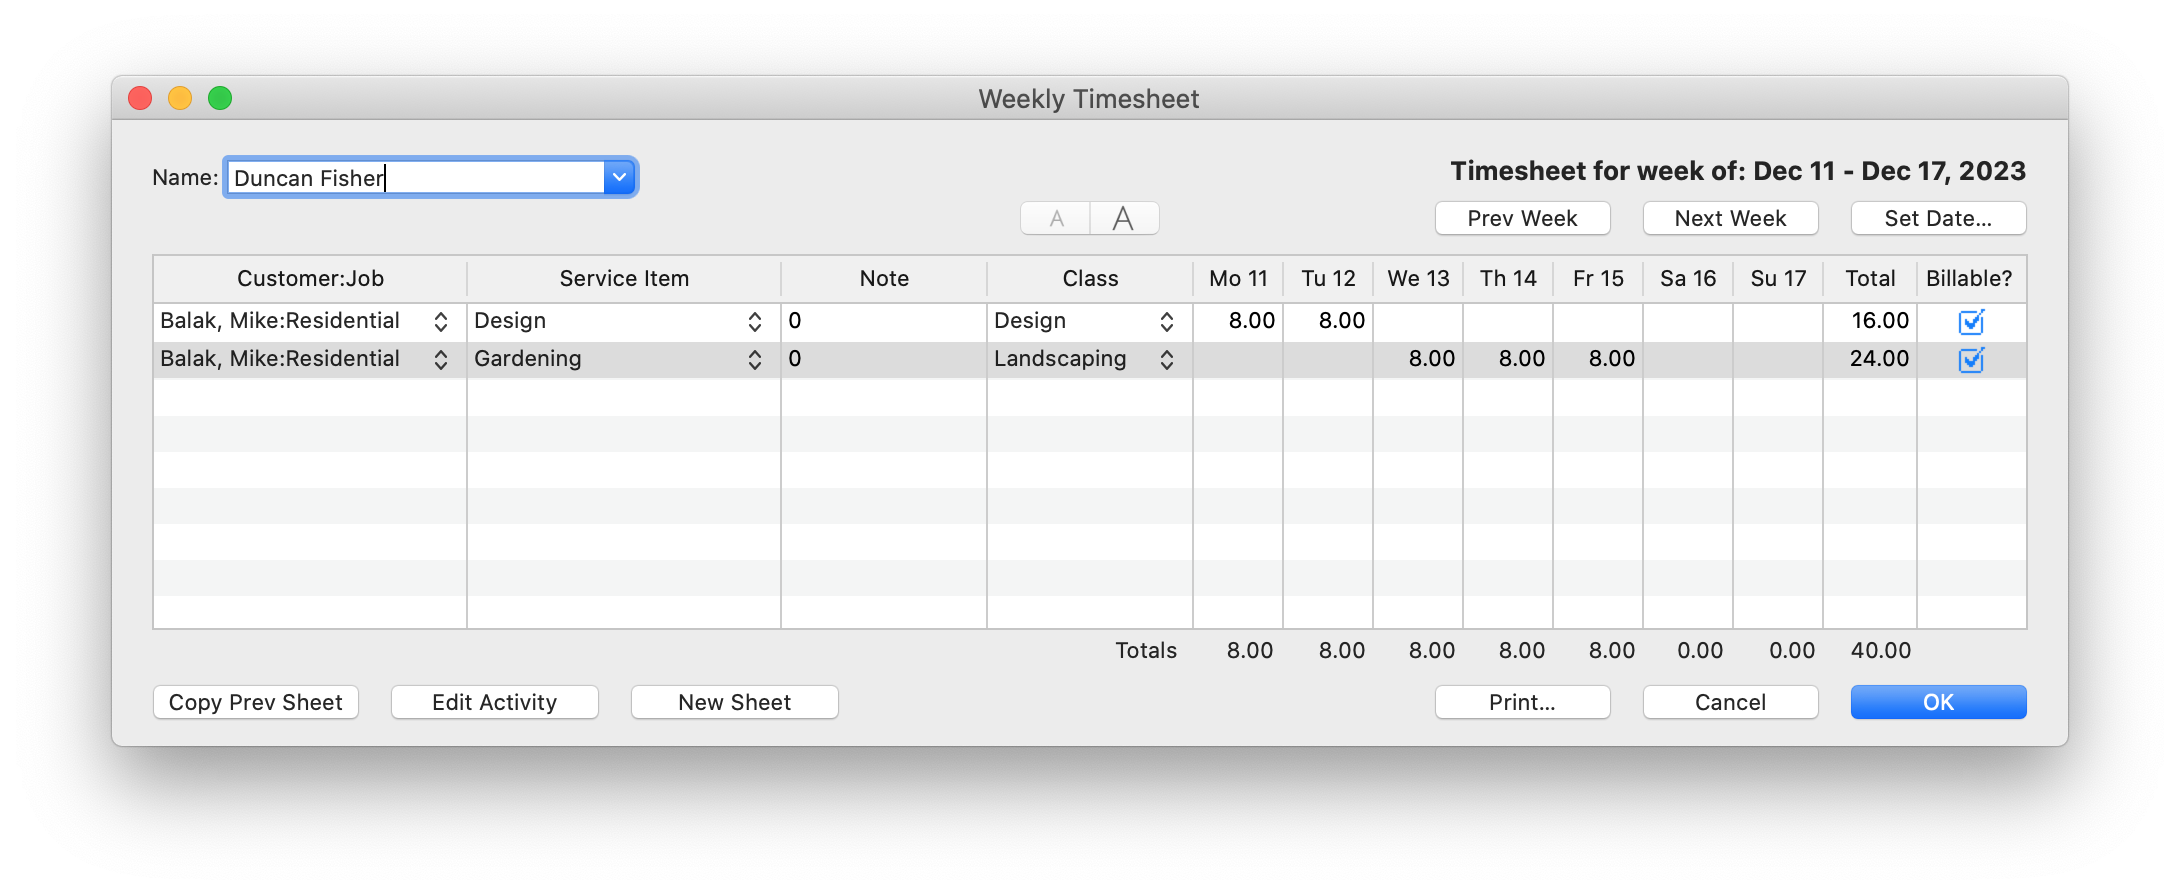
…and I want to add the timesheet that my employee filled out.
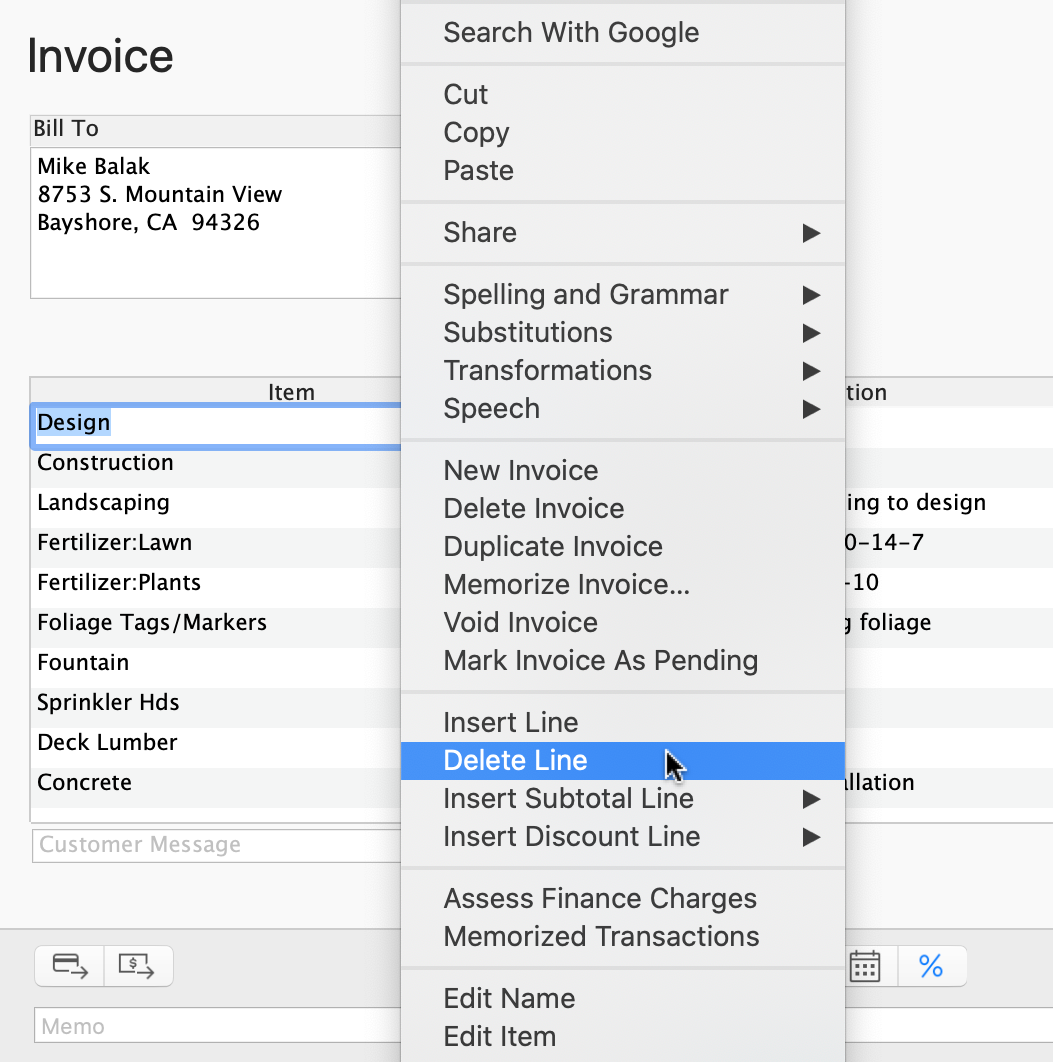
So on my invoice, I delete the estimated time by selecting the line item for the estimated time, then right-click and choose Delete Line.
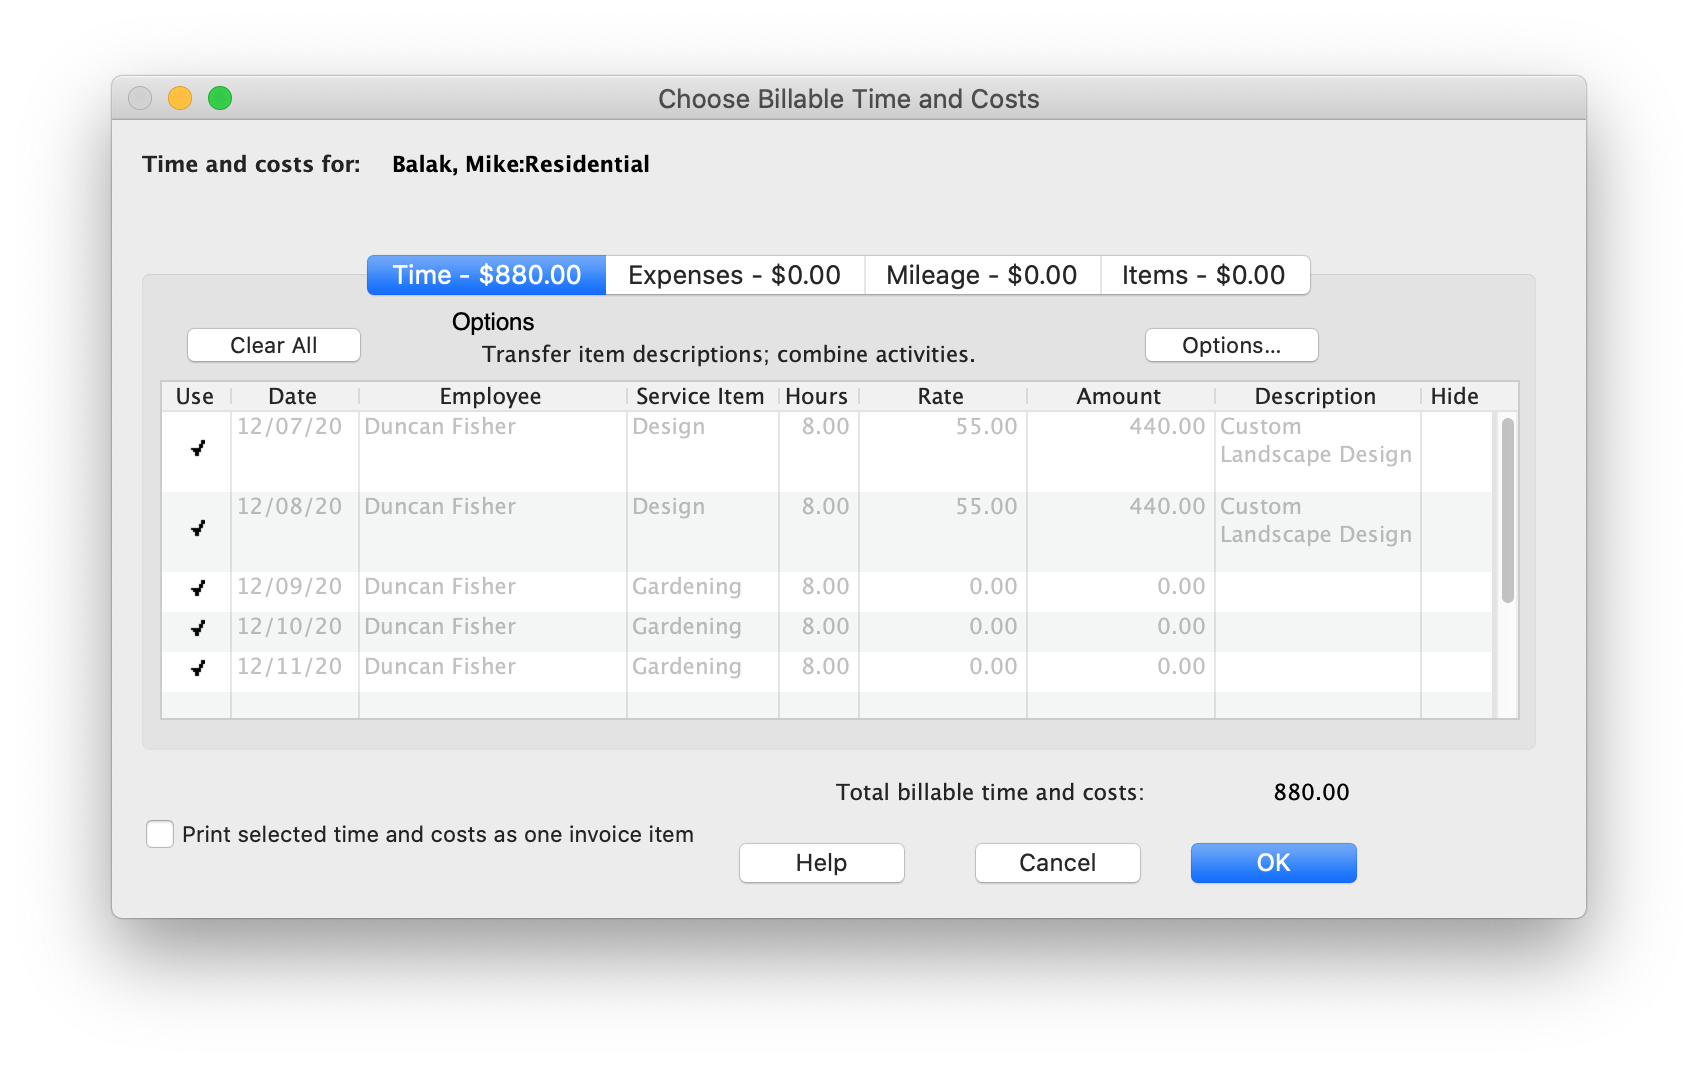
Then I click Time/Costs at the top of the Invoice window and add the billable time from my employee’s timesheet.
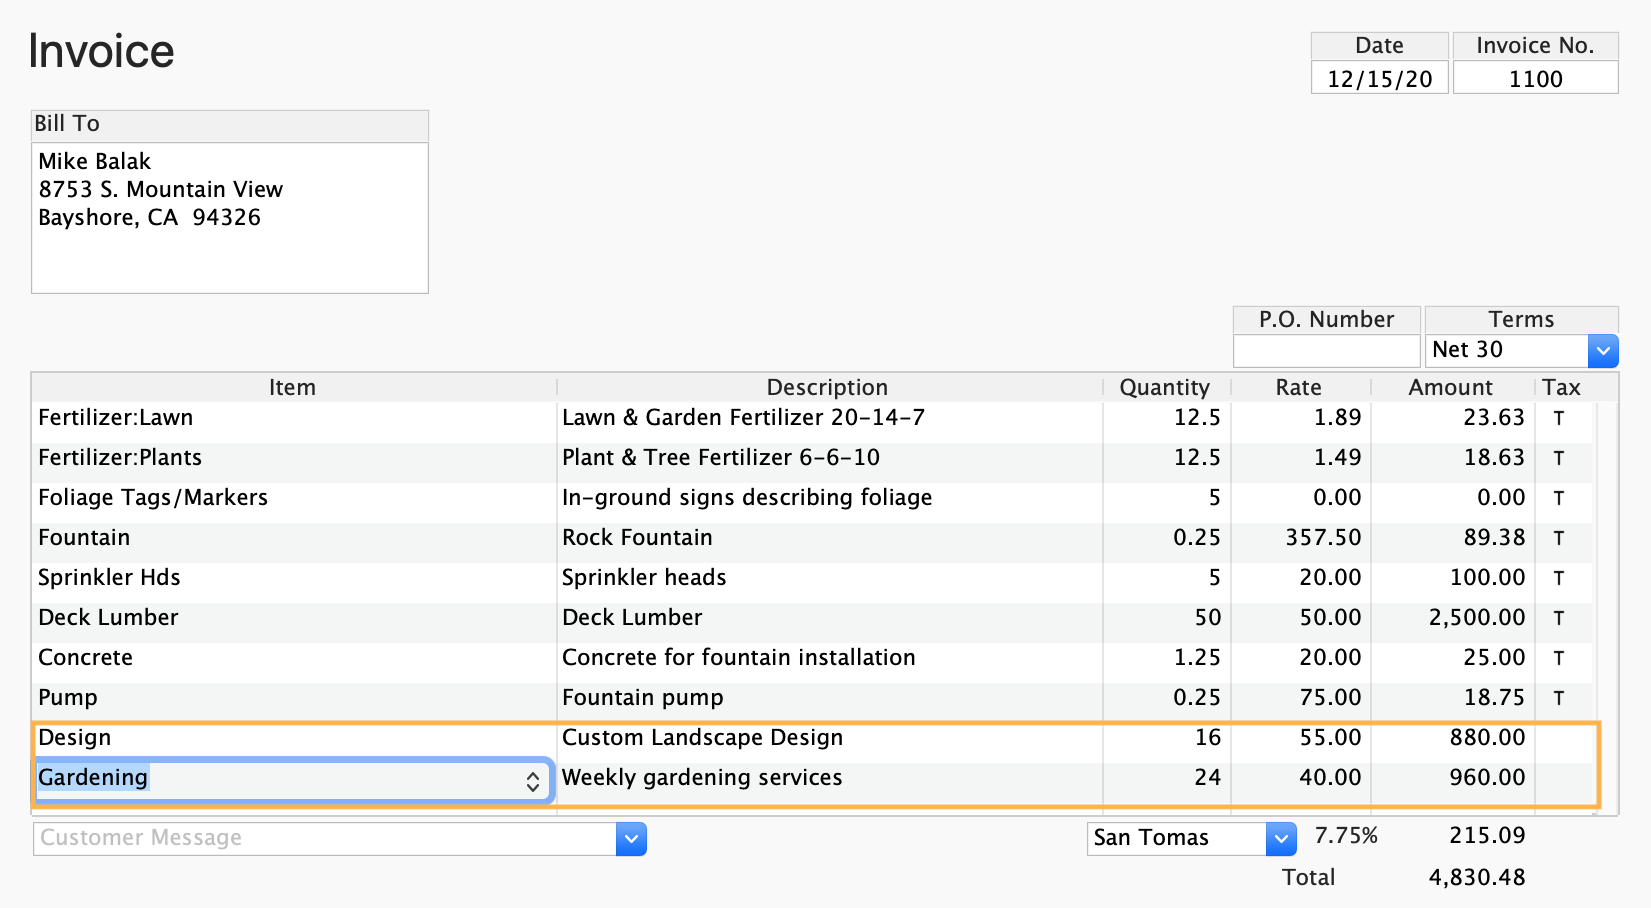
Now my invoice lists the work my employee put on his timesheet.
So that’s how you work with time sheets and progress invoicing. This article answers a user’s question on Twitter. If you’d like to ask us a question, you can find us on Facebook and Twitter.


