If you’re reading this, it’s probably tax time and you have some 1099-forms to file. Luckily, we have a wizard to guide you through the process of reviewing, preparing, and printing or e-filing your 1099s.
Here’s what you need to do to use the 1099 Wizard:
Step 1:Open the QuickBooks 1099 wizard
-
- Choose Vendors > 1099s > Print or E-File 1099s/1096…
Note: To have access to the 1099 wizard, make sure you have “1099 forms are filed” selected in your 1099 preferences (QuickBooks > Preferences… > 1099s). If you do not have this option selected, you will not be able to open the 1099 wizard.
Step 2: Choose whether you’re working with 1099-NEC or 1099-MISC forms
There are two different workflows in the 1099 wizard, depending on which form you’re working with.
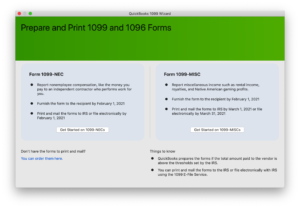
After you open the QuickBooks 1099 wizard, you will see information regarding 1099-NEC forms on the left and 1099-MISC forms on the right. Each side contains a button that says “Get Started.” Choose which form you want to prepare and click the corresponding “Get Started” button.
Step 3: Review your 1099 vendors
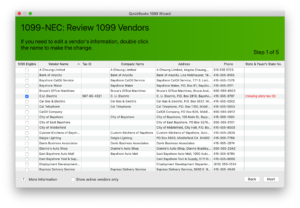
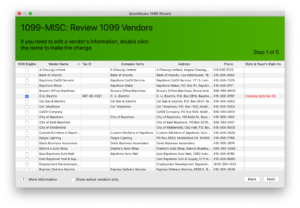
- Verify the 1099 eligibility settings.
If you’ve set up a vendor as a 1099 vendor in the Vendor Center, you’ll see a check next to that vendor’s name on this window. Be sure all the vendors you need to print a 1099 for have checks next to their names. - If you see any vendor that you need to print a 1099 for who doesn’t have a check mark, select the checkbox for that vendor.
- Review each 1099 vendor’s information to be sure it’s current. If you need to correct anything, double-click the vendor name. The Vendor window opens, so you can make any changes you need.Important: If you work with vendors in New Jersey or Wisconsin, be sure to fill in the state and payer’s state number.
- Click Next when you’re done.
Step 4: Map your accounts
If you’ve printed 1099s for vendors in the past, this window should look familiar. It’s your 1099s preferences screen. This is where you set up which accounts you’re using for which box on the 1099 form.
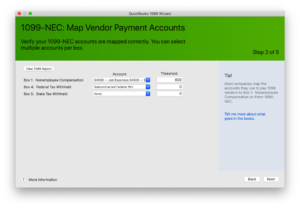
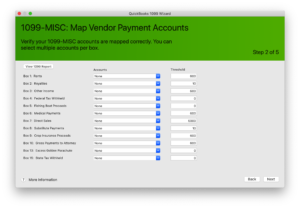
- Review your 1099 preferences to be sure they’re up-to-date.
- Make any changes you need to.
- If you need to take a look at the accounts you have been using with your 1099 vendors, click View 1099 Report, to look at a list of accounts you’ve associated with payments to these vendors.
- Click Next when you’re done.
Step 5: Review and adjust check payments
The IRS now requires that the card company or third party payor report credit card, debit card, and PayPal payments to 1099 vendors on the 1099-K form. You do not report these payments on the 1099-NEC or 1099-MISC form. So on this window, you need to be sure you have all your payments to 1099 vendors identified correctly.
Because you’ve already entered credit card payments as credit card payments, QuickBooks knows about them. What we’re trying to do here is make sure any payment with a debit card or PayPal that you may have recorded as a check includes enough detail so that QuickBooks knows to exclude it from the 1099-NEC or 1099-MISC form as the IRS now requires.
Here’s an example: Say you paid a subcontractor with your business’s debit card. When you entered that payment in QuickBooks, you entered it as a check since it was a withdrawal from your checking account. That’s all good.
But the problem is that now the IRS doesn’t want you to report this payment on the 1099-NEC or 1099-MISC form, so you need to go back to that check entry and change the check number so that QuickBooks knows it was a debit card payment.
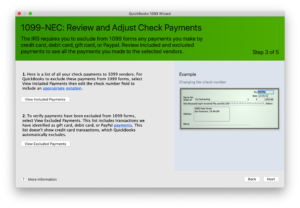
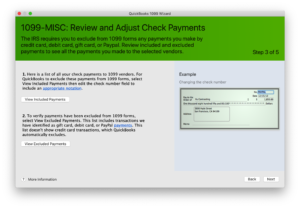
What do you need to do?
- Click View Included Payments to view a list of all your check payments to 1099 vendors.
- Review this list to see if there are any payments that should be identified as a debit card, or PayPal payment. This list shows everything that is currently listed as included on your 1099s. We need to identify the transactions that shouldn’t be here.
- If you see any transactions that were made with debit card, gift card, or PayPal payments, click the transaction to open it in the Create Check window. In the Check Number field, add an indicator that will tell QuickBooks what kind of payment this is. You must use one or more of these terms:
-
-
-
Debit Debitcard DBT DBT card Dcard Debit cd Visa Masterc MC Mcard Chase Discover Diners Paypal
-
-
-
- Now click View Excluded Payments. This list is for you to review the work you just did. The list shows you all the transactions you’ve identified as payments to 1099 vendors using debit cards and PayPal. These payments should be excluded from your 1099-NEC or 1099-MISC forms. If you need to make any changes, click the transaction to open it and make your changes.
- Click Next when you’re done excluding transactions.
Step 6: Confirm your 1099 entries
You’re probably tired of reviewing and confirming at this point, but it’s important to make sure that everything is right for the IRS. So hang in there for this one last window.
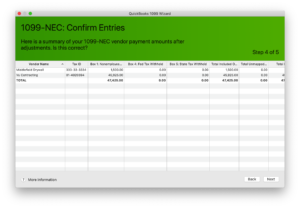
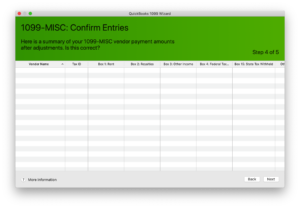
- Review the list of 1099 vendors and the payments you’ve made to them. Here’s what each column means when you use the 1099-NEC option:
- Box 1 Nonemployee Compensation: Amount paid to a non-employee during this year that is at least $600.
- Box 4 Federal Tax Witheld: Total amount of federal income tax witheld.
- Box 5 State Tax Witheld: Total amount of state income tax witheld.
- Total Included on 1099: Total payment amount that will be reported on the vendor’s 1099-NEC form.
- Total Unmapped to 1099: Total payment amount to vendors that is not associated with any of the 1099 boxes.
- Total Paid: Total payment amount you’ve made to the vendor. If you want to check your math, here’s what should add up: Total Paid = Total Included + Total Unmapped.
Here’s what each column means when you use the 1099-MISC option:
- Box 1 Rent: Amount of rent compensation you’ve received for land, building, or property use.
- Box 2 Royalties: Amount of royalties you’ve received. This should be $10 or more.
- Box 3 Other Income: Additional income that is not reported in the other boxes.
- Box 4 Federal Tax Witheld: Total amount of federal income tax witheld.
- Box 15 State Tax Witheld: Total amount of state income tax witheld.
- Other 1099 Boxes: Total payment amount associated with account(s) you matched to any other boxes.
- Total Included on 1099: Total payment amount that will be reported on the vendor’s 1099-MISC form.
- Total Unmapped to 1099: Total payment amount to vendors that is not associated with any of the 1099 boxes.
- Total Paid: Total payment amount you’ve made to the vendor. If you want to check your math, here’s what should add up: Total Paid = Total Included + Total Unmapped.
Does everything look OK? If so, click Next.
Additional state information
A couple of states have specific 1099 reporting requirements.
Important: Do you work with vendors in New Jersey or Wisconsin? If so, be sure to fill in the state and payer’s state number!
Watch a short video showing how this works.
New Jersey
Did you report $1000 or more? Did you withhold any state income tax from payments? If you answered yes to either of these questions, then you’re required to file a 1099-NEC or 1099-MISC form to the state of New Jersey.
New Jersey requires you to have a New Jersey withholding ID. Your ID should be the abbreviation for New Jersey (NJ) and your 12 digit NJ withholding ID, for example: NJ 999-999-999/999.
Get more information on filing 1099s to the state of New Jersey. Or contact the New Jersey Department of Treasury at 609-292-6748.
Wisconsin
Did you pay a 1099 contractor for rents, royalties, service, or work done in Wisconsin? Did you pay the contractor $600 or more? If you answered yes to both these questions, then you’re required to file a 1099-NEC or 1099‑MISC form to the state of Wisconsin.
Additional info:
- If you withheld any Wisconsin state income tax from a payment you made to your contractor or vendor, you’re required to have a Wisconsin withholding ID.
- Your ID should be the abbreviation for Wisconsin (WI) and your 15 digit WI withholding ID, for example: WI 999999999999999.
- If you didn’t withhold state income tax and don’t have any other requirement to have a Wisconsin withholding ID, then enter WI 036888888888801.
- Because the IRS does not forward 1099-NEC forms to Wisconsin, 1099-NEC forms need to be filed directly to the Wisconsin Department of Revenue.
- For more information, please contact the Wisconsin Department of Revenue .
Step 7: File your forms
Now you’re ready to file your 1099 forms!
You have two options for filing your 1099s:
- Print your forms: Click Print 1099s to print your forms when you’re ready. You’ll see a new window appear, allowing you to select which 1099s or 1096s that you would like to print.Reminder: you can’t print your forms on plain paper. You need preprinted forms to print on, and QuickBooks will fill in the information on the official forms. You can order those forms from Intuit if needed.
- E-file your forms: Choose this option if you’d like to E-file your 1099s directly to the IRS. This service will also automatically print and mail the 1099 forms to their recipients.
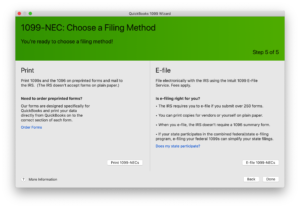
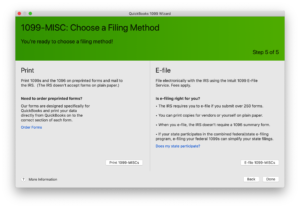
Here’s how to use the E-file service:
-
- To begin, click E-file 1099-NECs or E-file 1099-MISCs, depending on which form you’re using.
- Select the 1099s that you want to E-file, using the checkboxes on the left-hand side.
- When you’re ready, click Export and E-file 1099s.
- The “Save As” field will automatically populate with your company name and the type of file you’re exporting (1099 MISC or NEC). Select where you would prefer to save the file. When you’re ready, click Save.
- Next, the 1099 wizard supplies a brief guide on how to access Tax1099.com for E-filing. After you follow these steps, there will be additional instruction on Tax1099.com that you can use to E-file your 1099s.
- Click Done after you’ve read through the instructions on the 1099 wizard and are ready to begin E-filing.
That’s it!
Thanks for hanging in there through this process.
If you have any questions or concerns, the best place to go is our Community. There are a lot of other users, as well as ProAdvisors and Intuit employees, who are ready to help.


